I like 3D printing. It’s an interesting, if fiddly, hobby. Quite fun as long as you don’t actually need to print anything, because things go wrong All. The. Time. The filament snaps and your printhead goes on, obliviously, for hours. Data communications break down. The hot end that melts the plastic clogs, and no more feed. There’s no end to the amounts of disaster that can happen.
Since 3D printing is SLOW and error-prone, monitoring it remotely is very desirable. Hence, Octoprint – brilliant open-source software that can control your printer and expose what’s going on through a web interface. A lot of people control their printers through Octoprint running on a Raspberry Pi, so much so that the default way to get Octoprint is as a Debian-based distribution for the little computer called “OctoPi”. I wanted to run Octoprint, but I had no Raspberry Pi.
What I did have, however, was a decommissioned Core2Duo iMac from 2006. It was awesome back then – 256 MB of VRAM, 3 GB of RAM. I was living the life, I tell you.
The latest Mac OS that will barely limp along on this thing is 10.7 (“Lion”), 5 versions ago (we’re on 10.11 “El Capitan” now), and it works poorly. While I could probably get Octoprint to run on Lion, the lack of security patches on a system that’s meant to go on the Internet gave me pause. So I decided to install a modern, useful, resource-light operating system on it: Linux Mint 17.3
This guide will teach you how to turn your old iMac into a useful Octoprint controller. Thanks to @vafarmboy for the idea of writing this up!
What you’ll need:
- An old Intel Mac (some parts of this guide are iMac-specific) running some old version of OS X; mine used Lion, but anything 10.5 or greater should work.
- A blank writable DVD
- Making sure that you can afford to lose whatever information you have on that Mac.
- That Mac should be somehow connected to the Internet.
- A familiarity with system administration tasks on the Mac.
- Read THE ENTIRE GUIDE BEFORE DOING ANYTHING.
- Really, read the entire thing.
- Chutzpah
First steps
Boot into OS X. You’ll need to stash away a few Apple files, and modify the partitioning scheme of your computer. Again, you might -and as far as I know, WILL- lose everything on it, so back it up if you care about the contents.
Obtaining the iSight firmware
You’ll probably want to use the iMac’s built-in iSight, if it has one, to monitor the progress of your prints. The iSight is internally connected to the Mac as a USB device, but it runs proprietary firmware. That firmware is not available anywhere BUT an existing installation of Mac OS X. Hence, grab the following file and stash it away on a USB drive or cloud service to use later:
/System/Library/Extensions/IOUSBFamily.kext\
/Contents/PlugIns/AppleUSBVideoSupport.kext\
/Contents/MacOS/AppleUSBVideoSupport
(note that that is a SINGLE path spec – one file that you need to grab, broken into three lines for readability.)
If everything goes according to plan, you should be able to mount the Mac partition from Linux and just copy the file… but you never know, so please do yourself a favor and back it up.
Download Linux Mint
I highly recommend a very lightweight window manager (we’re talking 10-year old hardware, here) and a 32-bit version of the OS. While my Core2Duo can run 64-bit Linux, your Mac may not be able to; and 32-bit software tends to use less RAM than 64-bit versions of the same. We won’t be doing anything that requires a huge address space. Remember that the original runs on a Raspberry Pi 🙂
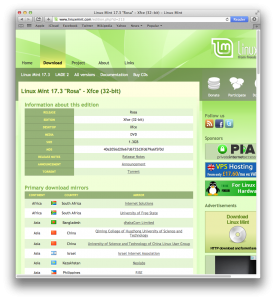
So, please download Linux Mint, Xfce desktop, 32-bit edition. It is remarkably clean-looking, elegant, and performant, especially if you remember I’m running it on 10 year old hardware. It makes for a pretty good desktop.
Create installation media
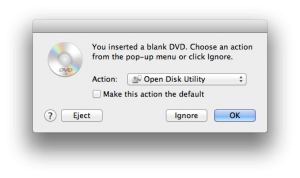
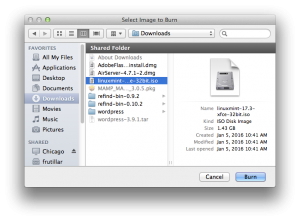
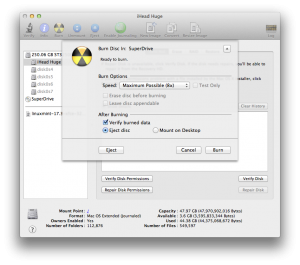
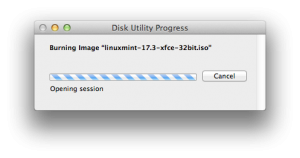
My old iMac can’t boot reliably from a USB device. You have to go old-school – burn a DVD of the thing. Disk Utility can do it for you, if you remember the Good Old Times™.
Installing a boot manager
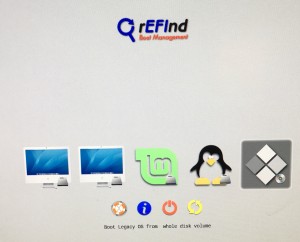
You’ll need something to allow you to choose which operating system to boot. Apple has a basic one that you access by holding down alt/option while booting. It doesn’t know about Linux, and is pretty dumb. We can do better. rEFInd is the gold standard for Intel Mac boot managers. It presents a friendly UI, and knows how to handle different Linux distros, Windows, and Mac OS.
So go to the page (I know, SourceForge), download the latest rEFInd binary (0.10.2 as of this writing) on your victim Mac, unzip it if your Mac doesn’t auto-do it for you, fire up a terminal, cd to the proper directory, and install it. Follow the onscreen prompts; rEFInd will try to elevate its own privileges via sudo.
cd ~/Downloads/refind-bin-0.10.2
./refind-install
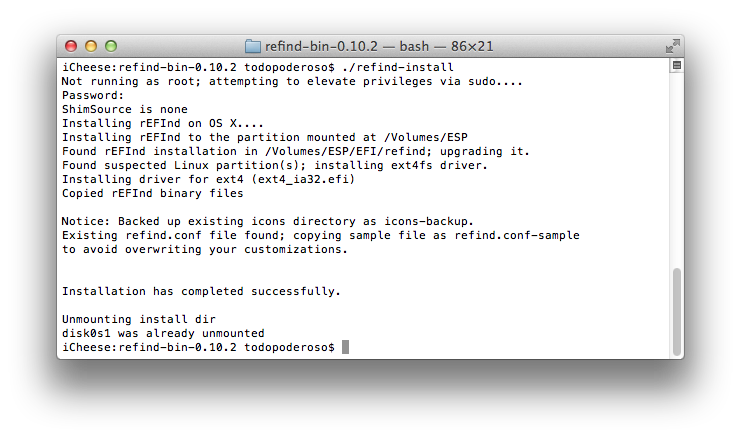
Note that I did this on the Mac where I already have installed rEFInd and Linux, so it found the existing Linux partition and upgraded my old rEFInd install. The procedure for installing a new version is the same.
rEFInd is obsessively documented by its author. If you have any doubts or issues, go read the documentation. And donate a few bucks if you can swing it. He’s done an awesome job.
Linuxing
Reboot
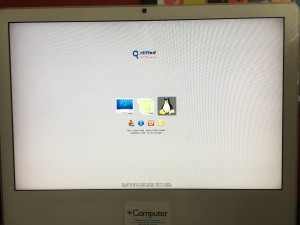
Make sure your shiny Linux DVD is inserted in the SuperDrive, and reboot the system. rEFInd should come up, and it should see the inserted volume as a generic “whole disk volume” and offer it as a viable boot option.

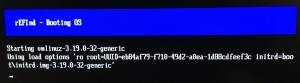
A few minutes later (remember, we’re talking 10-year old hardware and reading from a DVD here), you’ll be presented with a nice Linux desktop.
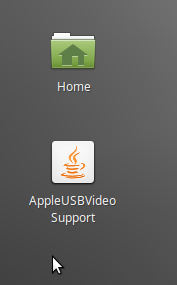
See the “Install Linux Mint” icon in the top left corner? Guess what we’re going to do.
Start the installer. It will want you to be connected to the Internet. My old iMac has a busted Ethernet port, and the live installer doesn’t know how to handle Apple’s wireless hardware. Too bad – I can’t slipstream updates and language packs into the install, but maybe you can; it doesn’t matter too much, as we will update the system later anyway.

I can’t guide you through the install beyond this, as my computer is already partitioned and running Mint. One of Mint’s quirks is that it wants to store data and operating system files on separate partitions, so you can wipe and reinstall the operating system on large upgrades without touching your data. LET IT DO THIS. You’ll thank me later.
See you on the other side.
Linux Mint configuration
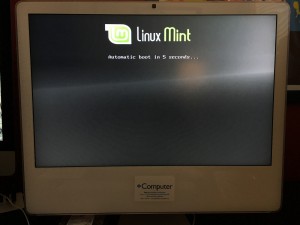
Once you reboot after the installation, Linux Mint should be an option on your rEFInd menu. Boot into it.
Make sure your Linux Mint system is connected to the Internet, select a spiffy wallpaper if you want, and open a terminal. Do the classic “update system” Debian Linux incantation to make sure you’re on the latest version of everything.
sudo apt-get update && sudo apt-get dist-upgrade
Reboot, and grab the AppleUSBVideoSupport file I told you to stash earlier. Place it on your spiffy desktop. If everything went well, you could also copy it from your Mac partition (open the file manager, click on the name of your Mac partition to mount it, navigate to /System/Library/… as described above and copy the file to your desktop).
Open a terminal and install the isight firmware tools.
sudo apt-get install isight-firmware-tools
The package will want to know the location of your AppleUSBVideoSupport file. Aren’t you glad you saved it? It should be at
/home/[your username]/Desktop/AppleUSBVideoSupport
and your system should be able to extract the iSight firmware from it. It’ll tell you if it succeeds.
You could now trash the file forever, but who knows when you’ll need Apple’s proprietary firmware again. Stash it someplace safe.
Octoprint
Octoprint is written in Python and runs on top of a fairly standard Python web software stack. However, it’ll need access to some hardware, and if you want it to run as a service instead of invoking it by hand every time, we’ll need to do a bit of work.
To get Octoprint itself, we’ll need git. To set it up as a robust web service, we’ll install it in its own isolated Python environment. To do that, we’ll need Python’s virtualenv module. To install Python packages within that environment, we’ll need pip. Some of OctoPrint’s dependencies need to be compiled against the Python development kit.
Let’s start by installing the necessary packages and their dependencies.
sudo apt-get install git python-dev python-virtualenv python-pip
Now we will create a Linux user that will “own” Octoprint.
sudo useradd octoprint
This user will host the Octoprint sourcecode, and a Python virtual environment containing the actually-running instance of Octoprint. This user will also need to be able to talk to serial (and USB) ports. Therefore, it needs to be added to some groups.
sudo usermod -a -G tty octoprint
sudo usermod -a -G dialout octoprint
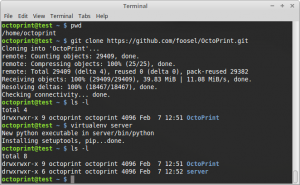
Become the user octoprint and switch to its home directory.
sudo su octoprint
cd /home/octoprint
Clone the Octoprint git repository.
git clone https://github.com/foosel/OctoPrint.git
Create a Python virtual env that will hold the running OctoPrint server.
virtualenv server
At this point, /home/octoprint will contain two directories, OctoPrint and server.
Enter the Python virtual environment to do the rest of the setup.
source ~/server/bin/activate
You’ll be rewarded with (server) pre-pended to your Bash prompt as a reminder that you’re operating inside the server virtual environment.
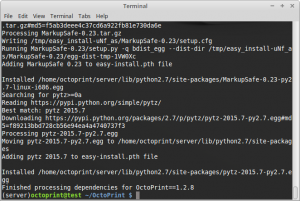
OctoPrint takes care of installing its own dependencies. We just need to execute the setup script. cd into the source directory and run it.
cd /home/octoprint/OctoPrint
python setup.py install
If everything goes well, the last line of output should read “Finished processing dependencies for OctoPrint…”. Otherwise, you’ll need to do some troubleshooting.
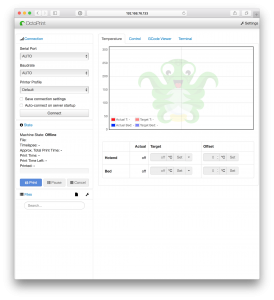
We’re not done yet with the installation, but we can run OctoPrint and check that it’s working at this moment. Try executing
octoprint
at the command line. Then open Firefox on your Linux machine and browse to http://localhost:5000

At this point, OctoPrint will work fine, but it still needs to be started by hand. Enjoy your success, but close Firefox, go to the terminal window and hit Control-C to stop the OctoPrint server. We’re not done yet.
Setting up the service
If you’re setting up a computer as a print server, you probably want the print server to start up when the computer boots.
Become your user with admin rights again (NOT the user octoprint), and copy the init scripts included with the Octoprint source code to their proper places. You also need to make the init script executable.
sudo cp /home/octoprint/OctoPrint/scripts/octoprint.init \
/etc/init.d/octoprint
sudo cp /home/octoprint/OctoPrint/scripts/octoprint.default \
/etc/default/octoprint
sudo chmod 755 /etc/init.d/octoprint
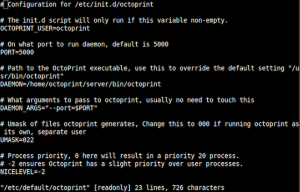
You’ll need to edit /etc/default/octoprint to reflect some of our configuration choices. In particular, make sure that the user and binary locations are set correctly. Use sudo nano /etc/default/octoprint to work on it. Note that the DAEMON line is commented originally. You need to uncomment it, so the new lines look like this:
OCTOPRINT_USER=octoprint
DAEMON=/home/octoprint/server/bin/octoprint
Finally, add the OctoPrint daemon to the system startup.
sudo update-rc.d octoprint defaults
Congratulations, you have a working OctoPrint server! Reboot and browse to your linux system’s ip address, port 5000 to see OctoPrint running in all its glory.
Webcam setup
COMING LATER – the webcam works fine under Linux, but I haven’t been able to get it working with Octoprint itself.